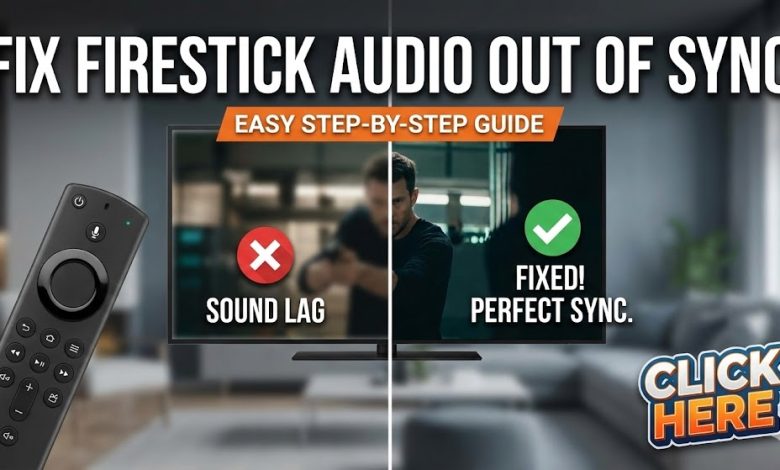
How to Fix Sound Out of Sync on Amazon Firestick (The Complete Guide)

Is there anything more annoying than watching a movie where the actor’s lips move, and the sound follows half a second later?
This “lip-sync” issue, where audio lags behind the video, is a common frustration for streaming device users. If you are experiencing audio delay on your Amazon Fire TV Stick, Cube, or Fire TV integrated television, you are not alone.
The good news is that this is almost always a software or settings issue, not a broken device. It’s usually caused by processing delays between your Firestick, your TV, and potentially an external soundbar or receiver.

In this in-depth guide, we will walk through the exact steps to fix sound out of sync on Amazon Firestick, starting with the quickest fixes and moving to more advanced settings.
Why Does Firestick Audio Get Out of Sync?
Before we fix it, it helps to know why it happens. Modern TVs do a lot of image processing to make the picture look good (motion smoothing, upscaling, etc.). This processing takes milliseconds.
If the TV takes longer to process the video than it does to process the audio, the sound comes out first. Conversely, sometimes a slow network connection or a struggling app can cause the video stream to lag behind the audio stream.
Whatever the cause, here is how to get everything back in harmony.
Learn How to Setup a VPN with our easy to follow guide to help protect your activity when streaming on Amazon Firestick!
Phase 1: The Quickest Fixes (Try These First!)
Don’t dive into deep settings menus until you have tried the “turn it off and on again” basics. These fix about 50% of audio sync issues.
1. The “System Restart” (Not just sleep mode)
Putting your Firestick to sleep doesn’t clear its temporary cache. You need a full reboot.
- Go to the Fire TV Home screen.
- Navigate to Settings (the gear icon on the far right).
- Select My Fire TV (or “Device & Software”).
- Scroll down and click Restart.
Alternative Method: Just unplug the power cord from the Firestick itself, wait 10 seconds, and plug it back in.
2. Check Your HDMI Connection
A loose HDMI connection can cause digital hiccups leading to audio lag.

- Unplug the Firestick from the HDMI port on your TV.
- Blow any dust out of the port.
- Plug it firmly back in.
- Pro Tip: If possible, try a different HDMI port on your TV. Sometimes one port (often labeled ARC or eARC) handles audio differently than others.
3. Clear Cache on the Problem App
Is the sound only out of sync on Netflix, but fine on Prime Video? If so, it’s an app issue.
- Go to Settings > Applications.
- Select Manage Installed Applications.
- Find the app that is lagging (e.g., Netflix).
- Click on it and select Clear Cache (Do NOT click Clear Data unless you want to log back in).
- Force stop the app, relaunch it, and test the audio.
Phase 2: The Built-in Fire TV Solution (Most Likely Fix)
If the quick fixes didn’t work, Amazon has built a specific tool into the Fire OS software to handle AV (Audio/Video) sync issues. This is usually the silver bullet.
How to Use AV Sync Tuning
This tool displays a bouncing ball and a flash on the screen. Your goal is to align the audio click with the visual flash.
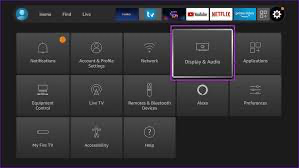
- From your Fire TV home screen, go to Settings.
- Select Display & Sounds.
- Scroll down and click on Audio.
- Select AV Sync Tuning.
(Note: On some older Fire OS versions, this might just be listed under “Display & Sounds” without going into the “Audio” submenu.)
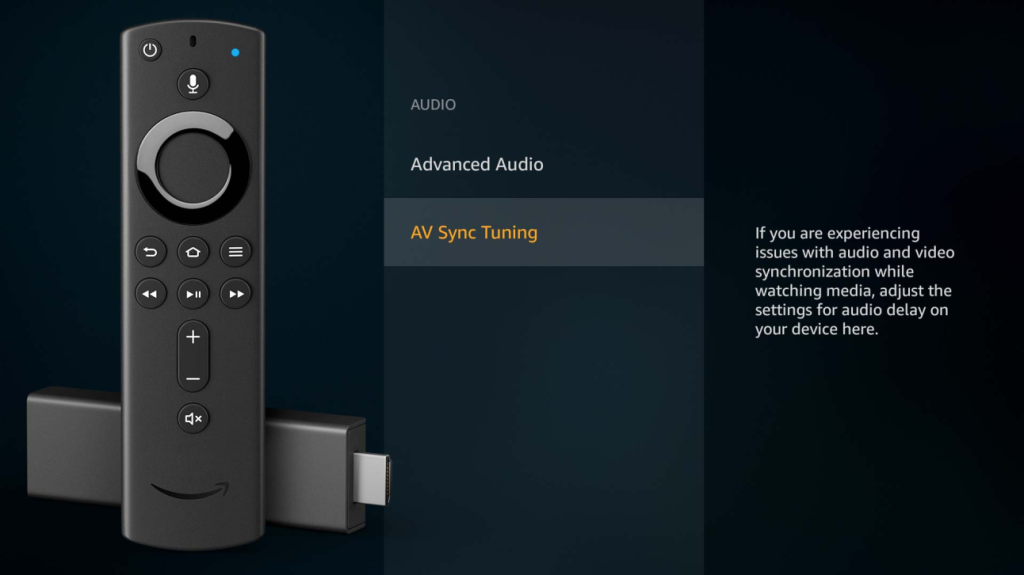
As the ball bounces, use the Left and Right directional buttons on your Firestick remote. You will see a bar at the bottom of the screen move. Adjust it until the “click” sound happens exactly when the ball hits the line and flashes.
Once it looks synced, press the Back button on your remote to save the settings. Go test your video content.
Phase 3: Advanced Audio Settings
If the AV Sync tool didn’t completely solve it, the issue might be how your Firestick is processing surround sound formats, especially if you are using an older TV or a soundbar.
1. Change Surround Sound Settings
Sometimes forcing the Firestick to process advanced audio formats like Dolby Atmos can cause delays on systems that can’t handle them quickly.

- Go to Settings > Display & Sounds > Audio.
- Select Surround Sound.
- By default, it’s likely on “Best Available.”
- Change this setting to Stereo (or PCM).
Test your video. If the sync is fixed, you know your TV/Soundbar was struggling with the surround sound processing. You may want to try “Dolby Digital” instead of Stereo to see if you can keep surround sound without the lag.
2. Turn Off “Dialogue Enhancer” or “Volume Leveler”
Some audio processing features add extra milliseconds of delay.
- Go to Settings > Display & Sounds > Audio.
- Look for Advanced Audio.
- If you have options like Volume Leveler or Dialogue Enhancer turned on, turn them Off and test.
Phase 4: Check Your TV and Soundbar Settings
If you have changed everything on the Firestick and the audio is still lagging, the problem is likely your television or external sound system.
1. TV “Game Mode”
Most modern TVs have a “Game Mode.” This mode turns off all the fancy image post-processing to ensure the fastest possible response time for video games. Turning this ON often aligns the video back with the audio.
- Look on your TV’s original remote for a “Picture Mode” button and cycle through until you find “Game.”
2. Soundbar Audio Delay Settings
If you use a soundbar or receiver, they almost always have their own “Audio Sync” or “Lip Sync” feature buried in their menus. Grab your soundbar remote and look for a “Sync” or “Delay” button to adjust the audio timing manually on that device.
Summary: Getting Back in Sync
Fixing sound out of sync on an Amazon Firestick is usually a process of elimination. Start with a simple restart, move to the built-in AV Sync Tuning tool, and finally, adjust your surround sound formats.
Hopefully, your audio and video are now perfectly matched, and you can get back to enjoying your streaming experience frustration-free.
Did one of these steps fix your issue? Let us know which one worked for you in the comments below!